Stubborn water spots and fingerprints can ruin the joy of spinning a clean record. If you’ve spent time cleaning your collection, using effective vinyl drying methods is essential to maintaining great sound and preserving those irreplaceable covers.
Neglecting proper vinyl drying methods leads to faint streaks, trapped dust, and warping, making every cleaning session less effective. No collector wants visible marks or a crackling playback just because moisture was left behind.
Diving into this article, you’ll discover tested methods, step-by-step guides, and smart accessories, so your vinyl dries spotless and damage-free every time. You’ll finish with a toolkit for flawless records.
Setting the Foundation: A Reliable Surface and Hands-On Prep
Creating the right drying environment instantly reduces the risk of accidental marks or static. The base you use should match your drying routine and space, supporting good habits from the start.
Start with a soft, lint-free surface such as a dedicated drying rack or microfiber mat. Think of it like folding laundry on a clean bed: each step should keep contaminants away.
Choosing the Right Drying Spot
Avoid crowded tables or kitchen counters that might harbor food residue or dust. Pick a low-traffic, clean area where you can lay records flat without interference.
Example: “I always lay my records face up on a dresser I wipe down before starting. Even a single crumb could leave a faint dimple in the vinyl, so I double-check the space.”
A calm spot with good airflow stops accidental bumps. If you notice pet hair or dust, pause and clean the drying area first for best results.
Using Protective Mats and Accessories
Microfiber mats prevent static and wick away remaining moisture better than towels. Set a mat aside just for records, ensuring it’s always debris-free.
Some collectors use dish racks with slotted stands, lining each groove with a microfiber strip to keep records upright without contact on the face. This aids even drying and avoids pressure points.
Washable silicone mats also work well when cleaned regularly. Avoid colored towels or paper, as dyes and lint transfer can permanently affect grooves and labels.
| Drying Surface | Pros | Cons | Best Practice |
|---|---|---|---|
| Microfiber Mat | Gentle, lint-free, reusable | Needs frequent washing | Clean after each session |
| Dish Rack (lined) | Vertical drying, airflow | Requires lining | Add microfiber strips inside slots |
| Paper Towel | Disposable | Lint sticks to grooves | Avoid for direct contact |
| Silicone Mat | Easy to wash | Attracts dust if left unclean | Store covered, clean weekly |
| Hardwood Table | Stable surface | Risks scratches, absorbs water | Always place a mat on top first |
Tapping Into Air Circulation Without Rushing the Process
Consistent airflow helps records dry without spots or residue, but too much force introduces dust or causes records to tip. It’s all about controlled movement and patience.
Letting records rest in a room with moderate air movement, away from fans or vents, provides the right pace for moisture to evaporate gently and fully.
Safe Air-Drying Guidelines
Prop cleaned records vertically using a lined rack, spaced so no edge contacts another. Position racks near a window or door, but never directly in a draft or sunlight.
Monitor the drying area for new dust every 30 minutes. If you sneeze or notice floating lint, cover records lightly with a clean, breathable cloth until airflow settles.
Wait for full drying before stacking, even if the record looks dry on the surface. A hidden drop under the label can seep out and leave a lasting mark if sleeved too soon.
- Keep records at least 6 inches apart in racks; prevents leaning and warping during drying.
- Clean racks before each use to avoid transferring old dust or moisture residue.
- Rotate record position after 20 minutes if drying on a flat mat, ensuring all sides air out evenly.
- If room is humid, use a small dehumidifier in corners—not pointing directly at vinyl.
- Check edge grooving for beads of water; a detail brush or tissue can carefully wick these away.
Don’t touch grooves after cleaning. Newly wet records attract fingerprints, and oils at this stage may create permanent smudges or even mold spots.
Creating a Spotless Routine With Simple Tools
Assign specific tools just for vinyl drying: labeled air brushes, lint rollers, or lightweight drying cloths stored away from common household supplies.
After bringing a new piece home, say: “I’ll stack this only after it’s fully dry and check twice for stray water drops on the runout area before sleeving.”
This habit builds consistency, keeps stray water off sleeves, and ensures repeatable results every cleaning batch.
- Use a clean, soft brush to gently move lingering water off edges as a final step.
- Spin each record slowly on a mat to let air reach every section—even those under the label.
- Practice not touching labels directly until completely dry to avoid softening and tearing.
- Store a small LED nearby; the angle of light reveals any drying streaks for a last-minute check.
- Once records are dry, immediately move to sleeves to prevent new dust collecting on freshly cleaned vinyl.
Getting Results With Contact-Free Air Dryers and Dedicated Racks
Air-powered, contact-free drying removes water fast with less chance of adding debris or static. The key is using these methods gently, pairing airflow strength to the delicacy of vinyl records.
Accessory racks designed for records provide a hands-off way to dry multiple albums simultaneously. For example, a slotted dish rack fitted with microfiber strips keeps surfaces untouched and upright.
Low-Pressure Air Blowers: Practice and Placement
Choose a handheld air blower or a bulb pump, like those used to clean camera lenses. Hold the device 12 inches above the surface and sweep in slow, overlapping passes.
This method pushes moisture beads toward the edge, never forcing water deep into grooves. Use a light touch: bold blasts can stir up dust or unseat the record from its mat.
Finish each drying session by inspecting the vinyl in angled daylight, looking for missed drops or haze. If any appear, wait an extra minute or repeat with gentler airflow.
Hands-Off Drying With Record Racks
Dedicated vinyl drying racks space albums predictably for airflow. They prevent direct surface contact and stop delicate labels from bowing under their own weight while still wet.
A typical rack setup holds each record by the edge, using rubberized or fabric-coated tines to minimize impact. Look for racks that are easy to clean to avoid hidden lint build-up.
When drying multiple records, start a timer and rotate their order every fifteen minutes. This provides even access to airflow and avoids a pileup of moisture at the bottom of the stack.
| Drying Tool | Application | Works Best For | User Tip |
|---|---|---|---|
| Bulb Air Blower | Manual air puff | Removing water beads | Keep nozzle 12″ away |
| Electric Air Duster | Strong air stream | Large cleaning batches | Use on low setting |
| Record Drying Rack | Vertical air exposure | Multiple records | Rotate positions hourly |
| Lint Roller | Tack away lint | Post drying step | Use before resleeving |
| Microfiber Mat | Flat drying surface | Short-term drying | Wash between uses |
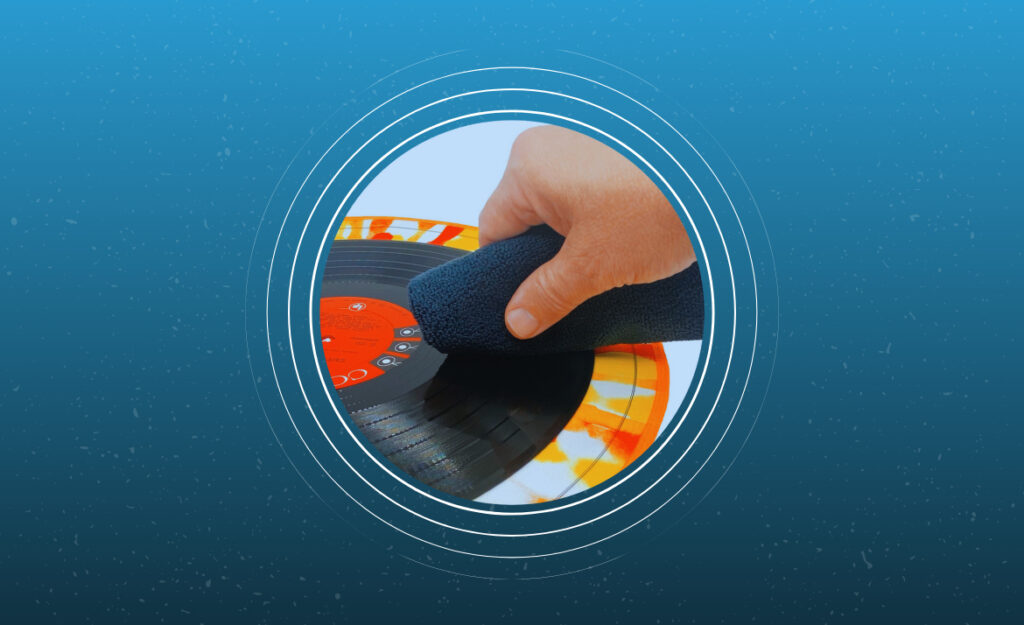
Minimizing Marks with Microfiber and Non-Abrasive Materials
Microfiber towels and non-abrasive drying materials are gentle on grooves, capturing moisture without leaving specks or scuffs. It’s critical to select fabrics designed for delicates, not those meant for general cleaning.
As a simple rule, only use materials on your vinyl that you’d trust with eyeglasses or camera lenses. Cheap cotton or paper alternatives can cause as much harm as hurried air-drying.
Top Towel Choices for Flawless Results
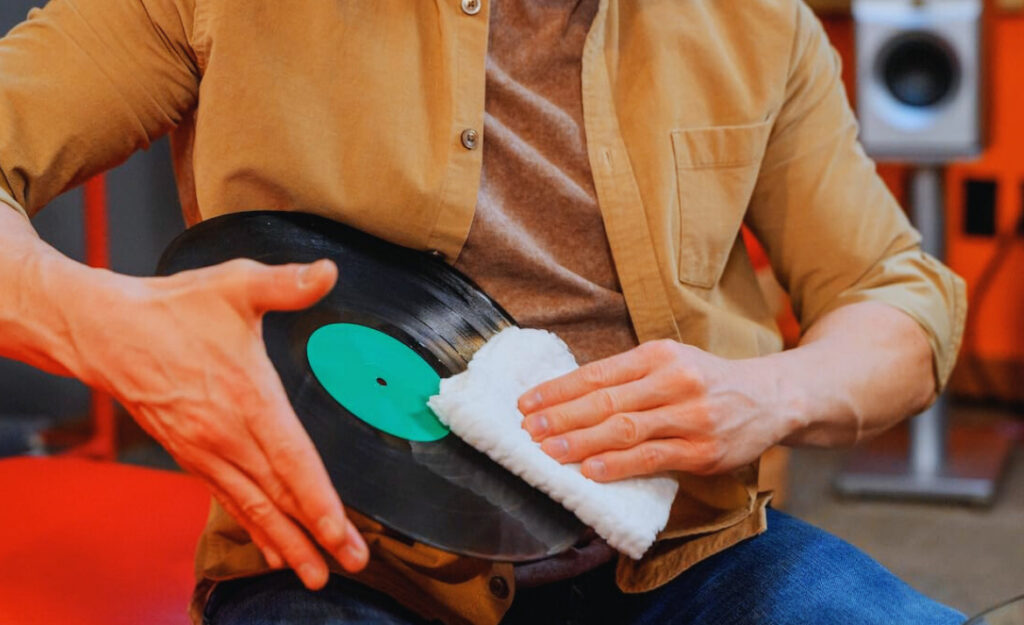
Look for premium microfiber towels, with edges finished to prevent fraying and lint. Assign one towel per side of each record during sessions to avoid reusing damp or soiled surfaces.
Fold towels to create a thick, cushiony bed—never drag the towel across a wet record. Instead, use a press-and-lift motion, covering every segment with fresh, dry sections.
Replace towels after any detergent residue lingers, as overused microfiber loses its absorption and begins to streak. If you see fibers left behind, wash the towels or switch to a new set before next use.
- Pat records gently rather than wiping, which stops tiny scratches on the vinyl face.
- Stack towels carefully between each step to avoid picking up floor debris.
- Test towels on a blank CD for lint before letting them touch vinyl—any visible fuzz means they’re not suitable.
- Change towels if they’ve come in contact with cleaning fluid residue for a spot-free shine.
- Store microfiber towels in sealed bags to prevent dust collection until your next cleaning round.
Never share microfiber towels with household glass or electronics, as hidden abrasives from previous use can mark records irreversibly.
Why Proper Drying Avoids Static Build Up
Microfiber lessens static charge that attracts dust, helping records stay clean after drying. If static lingers, gently wave a carbon fiber brush across the surface before resleeving.
This additional step mimics what photographers do with static-prone negatives: they always finish by de-charging the film, and you can do the same for vinyl.
Avoid fabric softeners when washing microfiber. Residue from these products creates more static and dulls both towels and records over time.
Using Heat-Free Methods to Dry Without Warping or Label Bleed
Never use household hair dryers or space heaters for drying vinyl. Direct heat warps delicate grooves, melts adhesives, and leads to label distortion or bleed-through that’s impossible to undo.
Dry only at room temperature, away from direct sun and warm appliances, using techniques that slowly draw out moisture without stressing the material.
The Risks of Exposing Records to Heat
Labels can bubble, fade, or peel even at surprisingly low heat. Think of vinyl like fresh pasta—too much warmth too quickly, and it sticks or tears.
If a record was exposed to heat after a wash, assess for visible warping by slowly spinning it on the platter. Any wobble means time to refine your drying routine.
If the label edge lifts, press gently with a dry microfiber cloth after cooling. Don’t use glue or tape, which ruins value and can introduce new hazards.
- Place drying records away from radiators and vents—even low, indirect heat sources deform vinyl if left too long.
- Monitor drying area temperature with a small digital thermometer.
- If a room grows humid after cleaning, crack a window for airflow—not cooling fans, which add dust.
- Keep labels from direct air blower impact; shield them with a folded towel edge if using a hand blower.
- Set timers to remind yourself to check records, catching potential heat exposure quickly before damage sets in.
Each preventative step ensures that heat never sneaks up on an unwatched stack of freshly washed records.
Storing Properly After Drying to Block New Dust and Static
Records dry and shine best when they’re protected right after the process. Outer conditions—dust, temperature swings, static—can undo hours of careful work in seconds if not managed immediately.
Use both new inner sleeves and fresh outer jackets. Avoid recycled sleeves with old debris or paper dust, which can stick to residual moisture and mark the clean surface.
Key Steps for Safe, Clean Storage
Slide records gently into antistatic inner sleeves. Slide the open side of the sleeve away from the album opening to reduce exposure to airborne particles when you remove it next time.
Store records vertically to stop warping and label rubbing. When replacing the outer jacket, ensure hands are free of moisture and oils by wiping with a microfiber towel just before handling.
If you notice true static clinging to the jacket, brush it down quickly with an antistatic cloth, mirroring what library archivists do with parchment between readings.
| Storage Material | Protection Level | Risk Level | Best Use |
|---|---|---|---|
| Polyethylene Inner Sleeve | High | Low (if unused) | Every cleaned record |
| Paper Inner Sleeve | Medium | Moderate lint/residue | Temporary short-term |
| New Outer Jacket | High | Low if clean | Final storage, collection |
| Zip-top Bag | Moderate | Condensation risk | Short-term, emergencies |
| Cardboard Box | Low | High for dust/static | Transport only |
- Slide into sleeves with two hands to keep labels from snagging on folded seams.
- Label sleeves with the cleaning date; this keeps track of rotation and flagging sleeves for replacement.
- Store records away from bookshelves or windows where dust accumulates between uses.
- Keep a log of cleaned records, noting any issues with drying, labels, or sleeves for next time.
- Don’t stack cleaned records before they’re sleeved—they attract dust rapidly in minutes after drying.
Organizing and tracking your post-drying process pays dividends every time you reach for an album to play.
Spotting and Correcting Mistakes in Your Drying Routine
Even careful cleaning can result in drying mishaps like streaks, water spots, or stubborn static if routines slip. Swiftly spotting and adjusting these patterns keeps your collection pristine for years.
Missed streaks may show as faint shine lines under angled light. If spotted, use a clean microfiber for a quick refinish rather than trying to buff it away with fingers or reused cloths.
Troubleshooting Common Drying Errors
A streaky surface suggests dirty towels or left-behind cleaning fluid. Make a note to wash towels more frequently and limit how much detergent you use per session.
Warps reveal improper stacking or accidental heat. Flattening them involves specialized weights and prolonged, low-pressure routines in a humidity-controlled area, never quick fixes like books or heated presses.
If static returns after drying, lightly pass a carbon fiber brush just before resleeving. Don’t resort to liquids designed for electronics, as these may cloud the vinyl finish unexpectedly.
Bringing It All Together: Sustainable Drying for Clean Listening
Establishing a repeatable, safe vinyl drying method guards both play quality and visual appeal. By choosing the right materials, tools, and routines, anyone can prevent the headaches of residue, static, or warping.
Proper drying isn’t a one-time act—it becomes a habit that pays off with every clear note and spotless groove. Integrate vinyl drying methods organically into your clean-up, and future sessions will always start with fresh, damage-free records.
Matching routines to your space, stack, and season lets your collection shine consistently. Next time you finish a cleaning, review your setup and take pride in every silent, flawless spin your efforts produce.