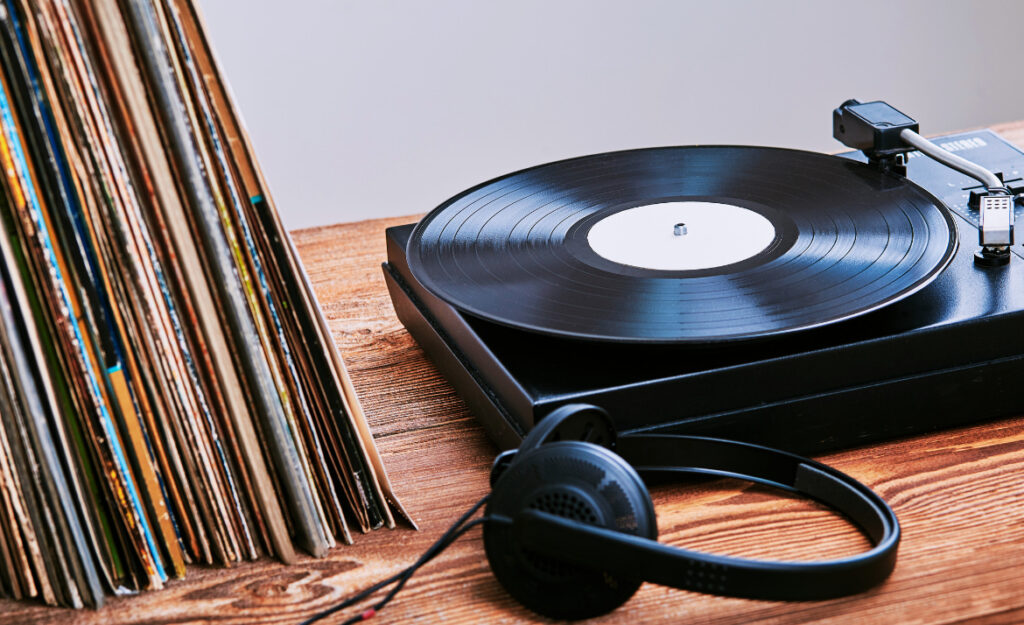
If you’ve noticed one channel seems weaker when spinning a favorite record, you’re not alone. Many vinyl fans search for a sound imbalance fix to restore that true stereo bliss in their music rooms.
Minor shifts in cartridge alignment, dust on contacts, or aging cables can all drag one channel down. The joy of vinyl comes from balance: both speakers filling your space as the artist intended.
Ready to explore sound imbalance fixes for your vinyl setup? Dive in below and you’ll find practical, scenario-based solutions that speak to real-life listening habits—no guesswork, just results you can hear.
Pinpointing Sound Imbalance: Listening and Troubleshooting in Real Life
Identifying which part of your vinyl setup is causing sound imbalance gives you a path to results. You’ll learn to separate subtle channel quirks from true audio issues.
Picture a quiet evening where you notice the vocals always seem pulled to the left—here’s your start: a sound imbalance fix begins with close, focused listening and methodical checking.
Channel Testing with Familiar Tracks
Select a record with clear stereo separation that you know well. Position yourself between your speakers and focus on vocals, hi-hats, or solo instruments that should be centered.
If you hear a particular instrument or voice strongly from one speaker and faintly from another, that’s a clue the sound imbalance fix lies in the playback chain. Note details for repeatability.
Use a balance test record or an audio test app if you want confirmation. These records issue tones or voice panning left to right, letting you pinpoint weak channels efficiently.
Visual Inspection and Contact Cleaning
Unplug your turntable and inspect cartridge wires for loose or tarnished connectors; even slight corrosion can quietly sap a channel’s strength. Wiggle connectors gently and reattach them firmly.
Dab a cotton swab in isopropyl alcohol, wiping each contact for a secure electrical path. This physical check often uncovers the source of gradual sound discrepancies, especially in vintage setups.
If cleaning brings one channel back to life, make it part of a quarterly routine. Keeping contacts clear is an easy preventive sound imbalance fix that fits into everyday maintenance.
| Component | Common Problem | Troubleshooting Tip | Actionable Result |
|---|---|---|---|
| Headshell/Cartridge | Loose wires or bad pins | Tighten headshell screws, clean pins | Improved channel symmetry |
| RCA Cables | Frayed or oxidized ends | Swap R/L cables to isolate issue | Channel loss tracked instantly |
| Phono Preamp | Uneven gain or faulty jacks | Test with another source | Confirmed or eliminated culprit |
| Amplifier | Dirty input selector contacts | Cycle selector, listen for dropouts | Smoother audio response |
| Speakers | Loose binding posts | Tighten all connections | Consistent, balanced output |
Dialing In Cartridge Alignment: Tiny Adjustments, Big Results
Realigning your cartridge builds the foundation for every other sound imbalance fix. Even a millimeter’s difference makes extreme changes to channel balance and spatial clarity.
Checking alignment requires patience but pays off with immersive, even sound. Treat the process as a straightforward, stepwise ritual—no mystery, just hands-on improvement.
Protractor Use in Step-by-Step Fashion
Secure a cartridge alignment protractor, which matches your turntable arm type. Place it on your platter and gently lower the needle to the grid points, checking that the cantilever sits parallel at both null points.
- Align cartridge body to grid lines—misalignment shifts sound left or right.
- Double-check at two points on protractor; both must match for consistent imaging.
- Look from above and the side to confirm parallel sides.
- Screw headshell lightly before final tightening—wiggle room helps with micro-adjustments.
- Test with favorite record after adjusting; listen for even vocals and wide stage.
After each tweak, expect subtle changes. Stop when vocals snap into place between your speakers—that’s the reward.
Tracking Force and Anti-Skate Tweaks
Set tracking force to your cartridge spec using a stylus gauge. Too heavy? Bass may dominate one side. Too light? Treble suffers and balance drifts.
Dial anti-skate to match tracking force. An under-set anti-skate pulls sound stage inward or outward. Use the blank-side record test to center the tonearm during play.
Revisit these settings anytime your system moves homes or you notice stereo imbalance. Consistent, regular checks keep music centered and engaging, making each record session feel brand-new.
- Measure tracking force at eye level for accuracy
- Move anti-skate dial slowly while listening to center image
- Repeat on several records to confirm stable results
- Make changes one at a time: note adjustments
- Keep a log for your most-played vinyl pressings
Once you’ve reached symmetrical, clean sound, jot down that tracking recipe so you can recreate it after giving your system any seasonal dust-down or upgrade.
Swapping Cables and Isolating the Culprit: Fast-Track Results from Quick Tests
Direct cable swaps cut troubleshooting time. If a channel disappears, swapping RCA cables at the phono stage instantly tells you if the cable or source is to blame.
Cable issues tend to show as abrupt volume loss or crackle. For any sound imbalance fix, always start by replacing the cheapest link in your audio chain.
Troubleshooting in Real Time: Step-by-Step Cable Testing
Turn off the amplifier, then swap left and right RCA cables. Power on and play a steady mono signal—if the weak channel switches sides, your cable’s the culprit.
No change after swapping? Eliminate cables as the cause and redirect attention to the cartridge or amplifier. Document each swap so you can retrace steps if issues resurface.
This hands-on process gets results fast. Once you’ve isolated a faulty cable, replace it for instant audio improvement and peace of mind with each record spun.
Practical Example: Neighbor’s Vinyl Setup Rescue
A friend describes their problem: “Every record sounds like the band’s huddled in one corner.” Plugging in a known-good cable set instantly brought center vocals back.
Lending your cables or trying theirs in your system helps you both find a working sound imbalance fix. Keeping extra RCAs on hand is a minor investment for a major listening upgrade.
After this swap, urge your vinyl buddy to label working cables and toss the flaky pair. A clear signal chain keeps everyone’s vinyl sessions stress-free and sonically rewarding.
Speaker Placement and Room Factors: Bringing Both Sides of the Stage to Life
Adjusting speakers just a couple inches can shift the balance dramatically, making or breaking the stereo image you hear. Follow these practical guidelines for balanced audio.
Set equal distance from speakers to primary listening spot and wall surfaces. The smallest differences echo like giant waves, pushing your soundstage off-center.
Simple Checklist for Correcting Placement
Move speakers to equal distances from each side wall and facing straight ahead. Use a tape measure on both sides of the room.
Toe-in slightly towards your favorite chair. Check the angle with a flashlight beam: both beams should cross just behind your head for optimal stereo image.
Mark the sweet spot on your floor. Move your chair into this position and listen: voices and solos should ‘lock’ in the center.
- Set both speakers at the same height and angle
- Check that nothing blocks the tweeter, not even a plant or curtain
- Space speakers and chair evenly for a triangle setup
- Test with a mono record; centered sound means even placement
- Log final positions with tape for easy resets after cleaning
Each adjustment builds a more immersive vinyl session, pulling instruments into natural relief rather than off to one side or the other.
Countering Asymmetrical Rooms and DIY Baffles
Some listening environments fight you: one wall’s closer, or a window catches excess treble. Soft furnishings like curtains or rugs balance reflections, aiding your sound imbalance fix mission.
If your setup sits near a blank wall, try placing a pillow or acoustic panel beside the nearest speaker. Admire the flatter, more integrated sound with minimal decorating effort.
Tricky room? Use what you have. Even a thick blanket draped during listening brings voices and instruments into sharper focus, revealing all the warmth and detail vinyl delivers.
System Maintenance Habits that Guarantee Consistency
Developing habits for regular cleaning and checking connections means every album stays balanced. Routine upkeep is less about crisis fixes and more about setting it and forgetting it.
Block out 10 minutes every other month to clean headshell connectors, brush off dust, and verify speaker terminals. This simple ritual prevents many issues that can sneak in over time.
Using a Sound Imbalance Log for Preventive Action
Keep a notebook near your turntable. Every time you adjust a connection, swap a cable, or change a cartridge, jot it down with the date and what you heard.
This “vinyl diary” makes tracking chronic issues a snap. If imbalance returns, refer back to your log—patterns or recurring problems usually pop right out for fast resolution.
Don’t rely on memory alone to catch recurring issues. A written log adds clear, actionable clues every time.
- Document cleaning dates and new cables
- Record tracking force, anti-skate, and stylus swaps
- Jot room changes (furniture moves, new rug)
- Note when friends notice odd channel behavior
- Flag improvements: what worked best for sound imbalance fix
Review this log monthly for trends—it’s the fastest way to get ahead of mystery problems and lock in even, full-range sound for good.
Troubleshooting Scenarios to Diagnose Persistent Imbalance
Having a clear troubleshooting routine means less trial and error. Map your symptoms to common causes below to save time and keep sessions frustration-free.
Sound imbalance fix techniques work best when you match your symptoms with potential failures in your specific vinyl system hardware.
Scenario: One Channel Dead Except with Headphones
If headphones play in stereo but speakers don’t, the speaker cables or connections are the likely culprit. Swap speaker leads between channels, carefully noting whether the issue follows the cable or stays put.
Should the problem persist, try another set of speakers briefly. If those work, your originals need closer inspection—loose wiring or blown drivers are common in older pairs.
This sequence gets you to the root problem with minimal gear swapping—always protect your amp by powering down before changing speaker wires.
Scenario: Sound Drifts Off Center Over Time
Notice vocals start centered but shift right after a few minutes? That’s a classic sign the anti-skate or tracking force is slightly off, forcing the stylus to bias toward one side.
Reset both parameters to cartridge recommendations, then verify after 15 minutes of play. If sound stays planted, you’ve nailed your sound imbalance fix.
Persistent drift means mechanical wear; at that point, consider a professional check or cartridge replacement. Never force the tonearm if resistance is felt—seek gentle, measured changes.
Finishing Out: Make Every Listening Session Balanced and Enjoyable
Recapping these fixes, remember that restoring balance isn’t mysterious—it’s practical and repeatable. Build routines with troubleshooting, alignment, swapping cables, and speaker placement to make your vinyl setup sing every time.
Keeping music centered improves not only how you hear albums but also how you feel listening. Small attention to detail—checking cables, cleaning contacts, logging changes—removes frustration and unlocks hours of rewarding sessions.
Enjoying even, clear audio from your records makes every play worthwhile. Treat sound imbalance fix steps as part of the ritual—each change connects you to your system and your music’s true intent.