Vinyl listening rooms tell a story of passion and nostalgia, but tangled cords can turn even a dream setup into a headache. Most vinyl enthusiasts run into clutter from wires, adapters, and speaker leads at some point. Discussing solutions for turntable cable management can transform your experience and make every session smoother.
Managing cables isn’t just about neatness. Stray or knotted wires disrupt the harmony of dedicated listening spaces, cause tripping hazards, and even add noise into your cherished audio chain. When your turntable setup looks intentional—wires tucked away and everything in place—music takes the spotlight once again.
If you’ve spent too long crouched behind your console sorting wires, it’s time for a change. Below, you’ll discover proven steps and realistic examples for making your cables behave, so your vinyl ritual stays effortless and your space feels inviting.
Setting Up a Clutter-Free Turntable: Start with a Simple Layout
Choosing a basic, functional layout creates the groundwork for easy turntable cable management. Begin with furniture that allows for hidden routing and direct access for cleaning, troubleshooting, or gear changes in the future.
Carefully position your turntable stand or shelf against a wall, leaving a little space at the back. This gap makes running cables behind your setup much easier while hiding them from immediate view—no spaghetti mess in sight.
Positioning Furniture to Support Cable Paths
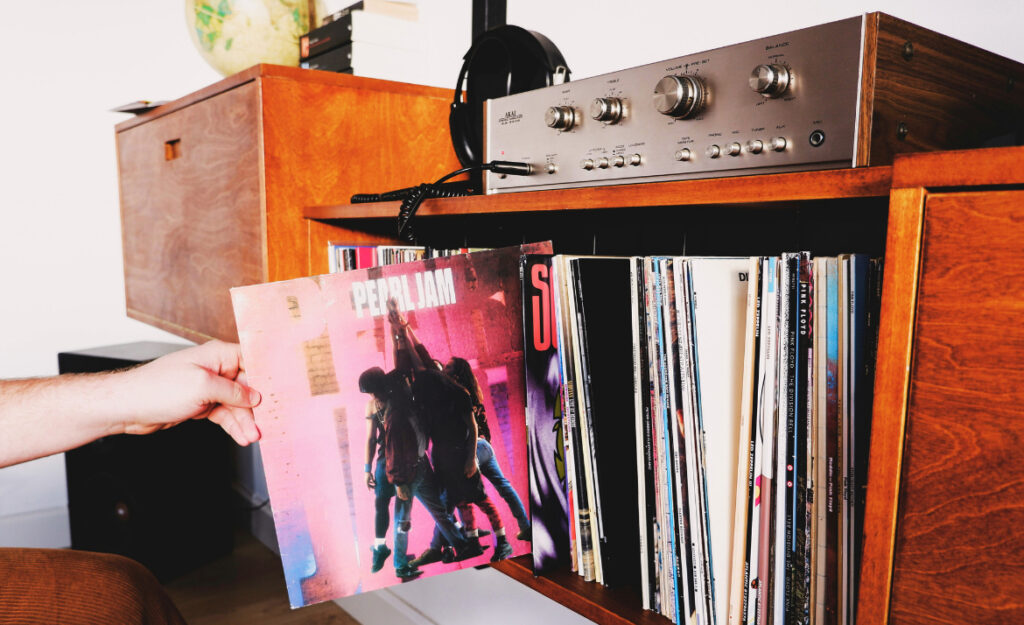
Some record shelves come with cable cutouts or back panels for guiding wires. Place these features near outlets or audio gear, so there’s less slack and more order from the start. If your shelf lacks built-in management, add adhesive clips or a cable sleeve along the underside.
Imagine sliding your hand under a sleek cabinet and finding all power and RCA cables bundled—nothing gets snagged, and the area stays clean. Test different placements until reaching a routine that feels natural; once you find it, stick with it to maintain consistency.
Use wall-mountable solutions if you can’t rearrange big furniture. Mount a slim strip or basket behind the table to keep everything elevated and untangled. A single tidy change can spark ongoing motivation.
Testing the Easiest Route for Audio Cables
Before finalizing cable placement, loosely route cables where you think they should go. Step back, look for overlaps or visible runs—those are prime trouble spots for knots or noise.
Once satisfied, fix only the shortest direct route with reusable ties. Avoid sharp bends around furniture edges, as these stress fragile signal cables. No more bending for lost wires behind your record drawers.
Remember: you’ll add or move gear eventually, so keep just enough slack to unplug or swap connections, while making the wires look slim and almost invisible to guests.
| Product | Type | Ease of Installation | Takeaway |
|---|---|---|---|
| Adhesive Cable Clips | Clip | Very Easy | Stick to shelves or walls for fast fixes on lightweight cables. |
| Velcro Cable Ties | Reusable Tie | Easy | Bundle cables; reuse as needed when moving or cleaning equipment. |
| Cable Sleeves | Sheath | Moderate | Hide multiple cords together; effective for behind-console use. |
| Raceway Channel | Surface Mount | Moderate | Paintable; conceals wires along baseboards or walls for a custom look. |
| Under-Desk Basket | Tray | Easy | Excellent for power strips and bulky adapters hidden under surfaces. |
Choosing the Right Tools: Building Your Vinyl Station’s Cable Kit
Having the right turntable cable management tools helps your vinyl corner stay both functional and beautiful. Each tool serves a specific role for the unique cable types you’ll encounter with audio equipment.
Once you spot the styles of cables—RCA interconnects, ground wires, power cords—choose tools that accommodate size and flexibility. The key is to simplify access and avoid excess slack without making cables too tight.
Selecting for Convenience: Small Tools, Big Impact
Cable ties—like adjustable Velcro strips—make it effortless to bundle cables loosely so you can add or remove cords any time. Adhesive-backed cable clips help direct thin wires neatly along shelves or the backs of furniture.
- Bundle RCA and ground wires separately to avoid crosstalk and make identification easier.
- Use fabric cable sleeves for visible runs, adding protection and uniformity—especially behind open shelving.
- Dedicated power cord wraps are useful for excess cable near the wall or creating a neat coil.
- Label cables on both ends for easy troubleshooting or rerouting down the line.
- Store unused adapters and extra cable neatly inside a small box to prevent accidental tangling with active connections.
Keeping your tools close in a drawer or tote ensures future updates don’t bring back mess. Set up a routine, like a quick tidy after each record-buying spree, to prevent disorder from creeping in.
Choosing for Durability: Lasting Solutions Over Quick Fixes
Invest in quality cable organizers that match your furniture’s color and won’t fatigue or break after repeated use. Metal trays last longer than plastic ones and add a premium touch under wood shelves.
- Anchor raceways with included mounting hardware to prevent wobbling—even when cleaning or rearranging.
- Check material flexibility; harder plastic clips may snap, so choose slightly pliable ones that won’t crack during cold seasons.
- Avoid adhesive cable guides on delicate or unfinished wood to preserve surfaces long-term.
- Invest in modular organizers that expand easily as your audio gear collection grows and needs change.
- Plan upgrades ahead: always purchase a few more clips and sleeves than required to allow for new cables.
Every addition to your vinyl nook deserves a tidy home; proper organizers make it easy to slip in new gear without disturbing your turntable cable management masterpiece.
Optimizing Cable Pathways: Visual Tricks and Tidy Routing for Vinyl Setups
When wires are kept in their place, your listening area appears intentionally designed—not just assembled. Effective cable pathways reduce clutter and can even help avoid audio interference in precise vinyl systems.
Let the direction of your cables mirror the layout of your space, just as a river carves its most efficient course through the landscape. This visual flow enhances the room’s aesthetics.
Creating Layers: Vertical vs. Horizontal Cable Paths
Stacking—vertical routing—uses cable trays under shelves, while horizontal routing tucks wires at the floor line or along the wall. Choose one system for each shelf layer and commit for clarity throughout.
For instance, run RCA lines behind the record shelf at hand-height, while power outlets are served with horizontal cord covers down by the baseboards. This distinction eliminates accidental signal and power interference.
Spotting a neat, single cable path next to your shelves feels as satisfying as flipping a fresh LP—predictable and under control, perfect for repeated enjoyment.
Planning Signal vs. Power Separation
Keep RCA and ground wires away from AC cords. Where paths must cross, do so at right angles to minimize electrical noise. Picture signal wires on the left and power runs on the right, with as much room between as possible.
In a cramped setup, shield signal cables with a fabric sleeve or place power supplies in a wire management tray below your cabinet. This method isolates sensitive connections from any electromagnetic nastiness.
Every six months, trace these paths visually. If a new device or adapter added mess, re-bundle wires by type to keep the entire system protected and organized.
Eliminating Noise and Hazards: Techniques for Worry-Free Listening
By managing cables, not only do you improve the look of your vinyl room, but you also prevent unwanted hums, buzzes, and overheating risks. Prioritizing safety and sound quality ensures that every session is relaxing and carefree.
Small behavioral tweaks—like unplugging unused power adapters after use—add up to fewer complications and less wear on your essential equipment.
Securing Connections and Preventing Trips
Fasten cables under shelves or along walls with low-profile clips. If running cables across the floor is unavoidable, use robust cord covers with textured surfaces to avoid slips or trips.
Visualize adjusting your stylus while friends drop by; no one stumbles, and your setup looks professional from every angle. Reset cords that creep out of position during cleaning or equipment changes.
If sharing space with pets or children, upgrade to thicker cable covers. Quick visual checks before sessions eliminate most physical risks and set a standard for neatness.
Reducing Interference and Hum in Vinyl Audio
Shielding cables from power supplies by routing along alternate paths can drop noise dramatically. When you notice background hum, first check the cable management: physical proximity between power and signal lines triggers issues fast.
Use ferrite beads on longer power cables as a second layer of noise reduction. Snap-on varieties require no tools—just clip in place and enjoy fewer audio headaches mid-play.
Regularly cleaning dust and oxidation at connection points helps, too. Scheduled attention prevents static buildup and keeps your listening fresh, even on marathon music days.
Finishing Touches: Small Changes With Big Impact
Every vinyl lover notices subtle improvements once cables disappear into harmony with their space. The work may feel tedious at first, but the payoff is a fresh inspiration every time you lift that stylus arm.
Adding soft lighting behind shelves, or choosing cable covers that match your wall color, blends technical improvements with cozy, welcoming style. Treat these tweaks as creative choices that accent what matters: spinning your favorite records.
Routine Care: Upkeep Without the Hassle
After each new record haul, do a quick scan under your setup. Look for cables coming loose or extra lengths spilling out—they sneak back when you’re not paying attention. One fast check each month keeps order from slipping.
For holiday decorations or seasonal changes, unplug gear before shifting furniture. Move cables aside, clean the dust, and reroute them in their original channels to prevent tangling or damage.
Remember: the goal is stability and ease. If a step feels annoying, simplify it for next time—replace stiff ties with reusables or pick up more adhesive clips when needed.
Personalizing With Decor and Details
Paintable raceways, decorative bins, and even labeled tags with your favorite band’s fonts make a vinyl area uniquely yours. Small gestures—like cable ties in your favorite color—bring personality to a routine task, making maintenance something to look forward to.
Occasionally swap out cable wraps for new color schemes. If you want a functional “refresh”, let friends or family pick themes for a session. Enjoyment and order are always compatible in vinyl listening.
Invite others to bring a record next time—seeing your setup’s organization may inspire fellow collectors and spark shared enthusiasm for the music, not the mess.
Celebrating a Tidy Vinyl Lifestyle: Confidence for Every Listener
Every intentional decision about turntable cable management builds trust in your vinyl sanctuary. With wires tucked away and trip-free, you move confidently through your space, focusing on favorite melodies instead of messes.
Organizing cables isn’t just a visual upgrade. It’s a practical, ongoing practice that enhances sound quality, fosters safety, and generates pride in your home music experience.
The next time a friend visits or a new record lands on your shelf, your setup’s clarity tells a story: here, music and mindfulness go hand in hand.