Ever spent an hour digging through shelves searching for the right vinyl record? That frustration can fade fast with the right vinyl labeling approach, which lets you spot your favorite albums instantly and keep your collection tidy.
Organizing vinyl records matters to longtime collectors and newcomers alike. Effective vinyl labeling not only saves time but also helps you keep those treasured sleeves and discs in top condition for years.
By learning some actionable vinyl labeling tips, you’ll transform a chaotic stack into a streamlined system. Read on to unlock reliable methods and simple tools that make sorting records less of a chore and more of a pleasure.
Deciding on Your Labeling System for Clarity and Speed
Choosing the right labeling system brings immediate order to your record shelves. Set your system early—whether alphabetic, by genre, or by era—to save time finding any album.
A clear vinyl labeling rule speeds up sorting: “Every new addition gets a tag as soon as it joins the shelf.” This habit prevents chaos and keeps the collection always browsable.
Establish Alphabetical Labels for Fast Retrieval
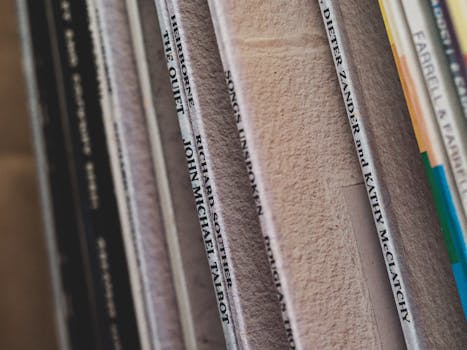
Apply alphabetic vinyl labeling using adhesive index tabs. Place tabs on the upper left of each divider, using large print or bold color for easy scanning from a standing position.
When using alphabet-based vinyl labeling, group by last name for artists or by group name for bands. This aligns with most collectors’ habits and public library systems.
If you add a new record, immediately insert a matching index tab or handwritten sticker. The “A–Z” structure stays intact when each entry gets labeled right away.
Genre-Based Labeling for Mood-Driven Selection
Divide your shelves with prominent genre labels—think “Jazz,” “Rock,” or “Electronic.” Use contrasting colors for each section so you can read them quickly, even in low light.
Vinyl labeling by genre helps if you want to cue music for a specific mood. For instance, when friends visit, it’s easy to head straight to “Soul” or “Disco.”
Stick genre labels directly on shelf edges or use clip-on tabs for temporary flexibility. This ensures that you can easily reassign sections when collections grow or shrink.
| Label Type | Best Placement | Durability | Use Case Advice |
|---|---|---|---|
| Alphabet Tabs | Divider Top Left | Long-Lasting | Best for quick artist or title find |
| Genre Stickers | Shelf Edge | Durable with lamination | Switch up sections as tastes shift |
| Era/Mood Tags | Slipcase or Divider | Short-Term, Replaceable | Rotate seasonally or for events |
| Color Code Dots | Record Spine or Corner | Resilient if waterproof | Track genres or loaned records |
| Handwritten Notes | Inner Sleeve Edge | Temporary | For quick notes or test pressings |
Choosing Materials That Support Durable and Flexible Labeling
Selecting strong, customizable materials makes vinyl labeling last longer and adapt as your collection grows. Look for removable adhesives and waterproof surfaces to prevent sticky residue or label damage.
Test samples of label materials on a spare sleeve before committing to the entire system. This small step avoids mishaps that can mar a record’s appearance or reduce its value.
Adhesive Choices for Vinyl Labeling
Vinyl labeling relies on adhesives that don’t leave a mark. Use removable label tabs or static cling stickers instead of standard tape—these keep sleeves pristine while securing visual order.
- Pick removable adhesive labels when marking spines or sleeves, so you can rearrange often without tearing surfaces or leaving glue behind.
- Choose static-cling stickers for clear vinyl labeling on hard plastic dividers; they stick securely but come off easily if you want to reorganize your shelves.
- Opt for low-tack painter’s tape for short-term vinyl labeling—such as planning a big re-sort—since it peels off cleanly and is available in many colors.
- Try magnetic label holders for steel shelving. They let you shuffle categories or sections quickly and reuse the holders as your collection shifts.
- Layer protective clear film over handwritten tags to keep the script readable and safe from moisture or dust without making labels permanent.
Sample different adhesive types before buying large packs—test for removability and look for any residue. Your vinyl labeling method should never risk damaging covers.
Label Surfaces and Writing Tools That Stay Legible
- Use laminated blank tabs for vinyl labeling; write with alcohol-based markers that resist smudging and fading over time with frequent handling.
- Pick white or neon colored label stock for contrast, ensuring each genre or alphabetical block stays visible from a distance on your shelves.
- Choose fine-tip markers for tighter spaces, but make sure the ink’s opacity is high so vinyl labeling is easy to read even in shadowy corners.
- Rotate through several pen colors if you mark by year or event, but document your scheme on a cheat sheet to avoid confusion as your system grows.
- Select pen types rated for plastic or card to maximize label longevity, reducing the need for rewriting or reprinting each season.
A dedicated label workspace—like a small desktop caddy—keeps tools handy for quick fixes, and encourages you to update vinyl labeling as needed without hassle.
Creating Consistent Visual Cues With Color Coding
Assigning consistent color codes to your vinyl labeling makes your entire setup function faster. Each color can signal a genre, mood, or ownership status at a single glance.
Add guide cards at the start of each color-coded section, or tape a color legend to your shelf. These markers become mental shortcuts, guiding you instantly to the right record.
Executing a Multi-Color Coding System
Once you choose a palette, stick to it with vinyl labeling. For example, use blue for jazz, red for rock, green for classical, and yellow for pop. Consistency is key—don’t switch shades mid-system.
Mark each record by attaching a colored circular sticker to the sleeve lower right corner. Maintain a reference chart taped inside a cupboard door for new visitors or forgetful days.
Duplicate color codes on both main shelves and overflow storage spaces, so vinyl labeling stays seamless no matter where you store your records or when your collection grows.
Implementing a Condition or Ownership Code
Some collectors add color dots to flag play quality or borrowing status. A green dot could signal “excellent,” while orange warns “needs cleaning”. A silver sticker shows “lent out.” Standardizing these helps prevent mistakes.
Apply these dots to the protective sleeve rather than the jacket, so they’re switched out easily without risking permanent labels or marks on vintage artwork.
A simple rule: Whenever lending a record, swap on the ownership color code right away and record details in a log. This keeps your rotation organized and retrievable.
Sequencing and Reshelving: Routines to Keep Sorting Simple
Efficient vinyl labeling works best with consistent reshelving habits. Always return records to their labeled spot after playing and update any changed details immediately.
Build short routines that suit your personality: “Spin, clean, reshelve, label-check.” This rhythm limits mess and means new arrivals don’t derail the rest of your system.
Scenario: New Purchase Intake
Picture this: You’ve just scored a rare LP at a record fair. The thrill of discovery is high, but organizing now secures its place in your library for good. Immediately assign a label with artist, genre, and color dot.
Jot down condition notes if needed. File the record behind the correct alphabet tab. “Done,” you think, as you step back, shelves looking just as neat as before, with vinyl labeling keeping things accessible.
This quick routine makes each new addition feel celebrated, not disruptive—the essence of vinyl labeling for collectors who value both order and creativity.
Weekly Maintenance: Quick Reshelf Audit
A simple Saturday routine keeps chaos away. Scan all shelf tabs, checking for missing or peeling vinyl labeling tags, and reattach any errant stickers or dots found lying inside sleeves.
Run a dust cloth over the visible edges, ensuring that bright colors and clean surfaces help your sorting system stay effective and attractive week after week.
A quick pen sits nearby in case an untagged album sneaks in. Making maintenance easy helps vinyl labeling remain a habit rather than a chore.
Using Digital Tools to Record and Enhance Labeling Systems
Pairing your physical vinyl labeling with digital aids multiplies order and customizability. Apps or spreadsheets let you log label details—tracking every artist, genre, date, and loan from your phone or desktop.
Digital inventories layer efficiency onto your tactile setup. For instance, scan a QR sticker on a sleeve to pull up condition notes, play history, or personal ratings wired to your labeling method.
Digitally Tracking Changes to Labeling Systems
Each time you update vinyl labeling—maybe a color changes or a new label style gets introduced—record it in your digital log. Snap photos of shelf sections for visual reference and add brief notes about your current codes.
Include snapshots of your color key or sample label designs. These quick records help you or anyone in your household maintain the system during reorganizations or moves.
Make backups of your digital files monthly so your hard-earned organization never vanishes due to accidental deletion or device mishaps.
Syncing Physical and Digital Labeling Techniques
Every record number or code on your physical label should match a unique row in your digital sheet. Assign a standard syntax for upgrades—like “Jazz_Blue_034″—so finding and syncing digital and physical records is seamless.
If a friend borrows a record, mark it “Lent: Sam 040822” both digitally and with a silver dot on the sleeve. Cross-verifying lets you never lose track, while also respecting the integrity of your original labeling.
Whenever your filing logic changes—for example, you split a genre into two subcategories—note the change in your digital file and update all affected label tabs in one sitting for a synchronized system.
Conclusion: Keeping Your Record Collection Fun to Explore
Smart vinyl labeling turns a massive stack into a smooth, engaging journey—every LP stands out with its unique tab, color, or code, all instantly readable and changeable as your collection evolves.
Learning to tweak your labeling method is as satisfying as picking a favorite record to play. The more orderly your system, the more likely you’ll keep discovering hidden gems inside your own library.
Each update to your vinyl labeling approach pays off with saved time, reduced stress, and more pride of ownership. Your records stay accessible, protected, and always ready to cue up the next great sound.