Every record lover knows the feeling: pulling out a favorite album and finding it perfectly clean and flat, just as it should be. The magic begins with smart vinyl shelving design, balancing function and aesthetics for shelves that keep records straight and safe.
Collectors understand that records, while attractive and nostalgic, also demand specific care for longevity. The way vinyl records are stored on shelves directly affects their sound, appearance, and value, making shelving choices critical.
Read on to uncover friendly, expert-backed approaches to vinyl shelving design so every record on your shelf stands proud and sounds its best. Discover fixes, features, and habits you can start today.
Planning the Right Shelf for Straight Records
The right shelving design starts with practical choices that directly impact your records’ health. Begin with the shelf’s size, shape, and construction, knowing each element has a different effect on keeping records straight over time.
Choosing a shelf that matches your collection’s current and future needs saves frustration later. Start by measuring your tallest album covers, then add at least an inch in height and depth to enable easy browsing and quick removal.
Prioritize Correct Shelf Depth
Most records are just under 12.5 inches, so shelving should be at least 13 inches deep. If your shelf is too shallow, albums tilt forward, risking warping or bending. A test-fit with a few albums confirms the measurement’s right.
When shelves are too deep, records can slide backward and may fall or become hard to reach. Slipping in a thin block or book as a makeshift backstop helps here, keeping records flush and accessible up front.
Place a flat hand on top of stacked albums and gently rock side to side. If they tip easily, the shelf is too shallow or deep, and some adjustment will prevent long-term slouching and keep your vinyl shelving design effective.
Shelving Materials That Hold Up
Classic wood or plywood shelves offer stability that supports even large vinyl libraries. Particleboard may sag over time, while strong plywood resists it. Aim for solid wood or metal when possible, since they withstand daily handling and weight.
Professional-grade steel brackets can add invisible strength below longer shelves. Many collectors prefer a warm, natural look, so high-quality birch or oak boards, especially when sealed, can elevate both durability and room style.
While glass adds visual pop, it’s risky for heavy album collections. Lightly tap an empty shelf for a sense of sturdiness. If it echoes or feels shaky, reinforce or replace before adding your prized vinyl.
| Shelf Material | Pros | Cons | What to Do Next |
|---|---|---|---|
| Solid Wood | Highly durable, stylish, resists sagging | Costs more, heavier | Seal regular wood; install with wall anchors for safety |
| Plywood | Affordable, moderately strong | Edges may chip or delaminate | Choose high grade; sand smooth and use brackets |
| Particleboard | Low price, lightweight | Prone to sagging, moisture damage | Limit shelf span; reinforce with under-bracing |
| Metal | Excellent support, modern look | Cold visual, can scratch vinyl covers | Add shelf liners; maintain level for extra safety |
| Glass | Clean design, open feel | Very fragile, not for heavy loads | Avoid for main collection; use elsewhere |
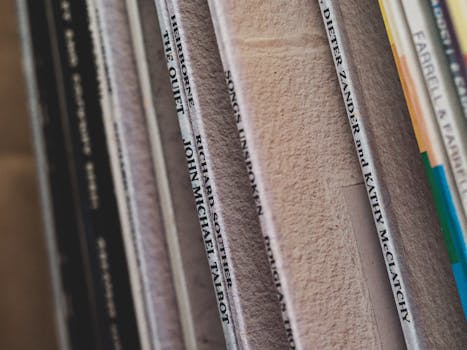
Arranging Records So They Stay Upright
Proper vinyl shelving design keeps records vertical. Upright storage prevents pressure on grooves or warping that comes from leaning or stacking. Organize your collection in a way that makes pulling and returning albums painless.
Once albums are on the shelf, monitor for bowing and crowd levels. Over-packed shelves make browsing harder and add bending risks, so strike a balance that feels snug but not forced—think gentle finger pressure when sliding a record.
Quick-Sort Placement Habits
Sort new purchases by genre or color sleeve. Place each album on the shelf with spines fully visible. Avoid dropping albums down onto their edges, which strains both the shelf and the jackets.
- Group records by album height to prevent uneven wear; tall albums cause smaller ones to slouch.
- Alternate thick box sets with single LPs to keep shelf tension balanced and prevent tipping.
- Slide in stiff separators if the row gets wobbly; old bookends or wood planks work well.
- Rotate the front record in each row weekly so the same cover isn’t exposed to light for long periods.
- Run your finger along the spines monthly; any change in alignment means it’s time to re-level.
Taking five minutes a week to inspect your shelves ensures upright, straight rows and keeps your vinyl shelving design low-maintenance.
Monitoring Shelf Load and Spacing
Every shelf should have some flex room—about half an inch of extra space makes browsing comfortable but avoids sliding. For long shelves, check for center sag by eye and with a ruler pressed end to end.
- Split large collections into shorter shelf runs, ideally 30–36 inches wide; this prevents sagging and keeps records aligned.
- Add a supporting divider or bookend roughly every foot to reduce side pressure and cushion albums.
- Keep adjustable shelving brackets handy—tighten every three to six months to maintain level alignment as wood settles.
- Top off sagging spots with a simple center post or leg under the midpoint of the shelf; use a sturdy block or dowel for a subtle fix.
- If a shelf sags more than a pencil’s width, swap it or add support before restocking records.
Quick fixes keep vinyl shelving design effective. Quick checks now prevent expensive repairs later and extend your entire collection’s lifespan.
Custom Solutions for Unique Spaces
Every home and listening room presents unique shelving challenges, but you can tailor vinyl shelving design to fit almost any space. Custom designs solve limits like awkward corners, alcoves, or height restrictions without risk to your records.
If you use an alcove or closet, install side stops or rails to keep records upright. For tight spaces, stack two short shelves instead of one tall unit, spreading weight and reducing the risk of warping. Odd angles call for triangular corner shelves.
Hidden Wall-Mounted Shelves for Small Rooms
If space disappears fast, mount shelves at eye-level along otherwise unused walls. Short, staggered shelves hold 30–40 albums apiece and keep precious square footage open. A builder’s level ensures perfect installation, helping records sit straight and look intentional.
Floating shelf styles suit modern or minimal homes. Each mount point needs both wall anchors and studs for extra strength if you store more than 20 records per shelf. See-through acrylic shelves offer a playful display for favorites while making visual checks easy.
When finishing, round over sharp front and side edges so jackets don’t snag. Finish with a matte, non-slip sealant to further protect album covers during everyday handling.
Modular Systems for Growing Record Collectors
Stackable cubes were designed for changing vinyl shelving design needs. Each cube fits 40 to 50 records, and you can add, remove, or rearrange as your collection grows. Try labeling each cube by genre or decade for quick retrieval.
An open-backed system doubles as a room divider or accent wall when color-coordinated. For renters, modular shelves that sit upright with no wall anchors are perfect—they move easily and adapt to new places.
Always anchor tall stacks to prevent toppling. Even though modular units look light, loaded with vinyl they can shift if bumped, so safety comes first for both your wax and the room.
Day-to-Day Habits That Keep Records Straight
Habitual maintenance amplifies smart vinyl shelving design. Make a habit of returning records upright after every listening session, preventing accidental leaning or over-stuffing. Consider this a closing ritual, right after placing the record back into its inner and outer sleeves.
If you notice any album tilting or crowding, create immediate space, even if it’s just by removing an album or two. This fixes alignment and keeps shelves stress-free until your next organizing session.
Gentle Handling and Frequent Rotation
Always grip records by the outer edges and avoid middle pressure. This mimics how librarians handle rare books and prevents hidden dings along album spines that can gradually place uneven stress on shelf rows.
Rotate highly played or displayed records weekly. Swap the position of the first three albums in each row with ones from deeper in the collection. This keeps sunlight, dust, and shelf compression even across all jackets.
Regular rotation also gives you a fresh look at long-forgotten albums—like flipping through an old photo album, every rediscovery inspires a new listening session. Add rotating checks to your monthly cleaning routine for best results.
Using Dividers and Soft Bumpers
Vinyl shelving design improves greatly with soft, customized dividers. Stiff cloth or velvet-covered planks act as a buffer against bumps when browsing and also keep tightly packed albums from fanning or tilting.
Add foam bumper strips to the inside lip of wood shelves. These are cheap and keep rough shelf edges from marking record jackets. Place one divider for every 10–15 records in high-traffic rows to break up groups and maintain upright pressure.
For collections in direct sunlight or drafty corners, thick fabric slipcovers or dust shields add another layer of shelf stability. These details help protect against edge-warping and climate swings that can cause misalignment.
Turntable Setup That Complements Shelving
The position of your turntable matters as much as the vinyl shelving design itself. Keep the player at or near waist height to encourage careful record placement and retrieval. Avoid putting the turntable atop active shelving to reduce vibration risks.
Build or purchase a separate player stand. This keeps vibrations and needle jumps away from albums and directs routine hand movement only to the turntable and not to stacked records. Bonus: cable clutter is kept tidier and easier to route.
Isolation Pads for Sensitive Shelves
Place isolation pads or thick rubber feet under the turntable. This dampens both external knocks and low bass rumbles, keeping shelf rows steady and upright, especially when listening to bass-heavy albums at high volume.
Extra-dense foam pads work well and can be trimmed to fit. Look for those rated to at least 20 pounds support for long-term reliability. Re-check pad squish and swap them out if major indentations form.
Analogously, think of these as comfy shoes for your record player—just as a supportive sneaker cushions your steps, these pads minimize shelf movement and help records stay straight.
Dedicated Listening Zones for Easy Shelving
Create a triangle layout—player in the center, records to the right or left, and a clear surface for cleaning and album prep. This patterned workflow reduces errors and makes it obvious when a record hasn’t been returned upright—prompting instant action.
Label or outline “return zones” with colored tape for kids or guests to follow. A simple reminder helps maintain record order long after the party’s over. Custom rules reduce shelf chaos and keep the whole family’s vinyl shelving design straight.
Mini-scenarios reinforce habits. When a friend says, “Where does this go?” point to the color spot or shelf divider, not just a random space. Routine creates long-term organization that withstands daily use.
Conclusion: Consistency Makes Vinyl Shelving Last
Consistent care and a thoughtful approach to vinyl shelving design prove just as important as the shelves themselves. The shape, placement, and material details you choose today influence the health and happiness of your collection for years.
Building habits like regular sorting, rotation, and gentle shelf checks turn care into routine. They make what could feel like chores into simple moments that protect your investment and allow a deeper connection with your entire collection.
Every time you touch a record, you’re reinforcing positive shelving habits. With the right vinyl shelving design, every album remains upright, accessible, and ready to play for decades, matching your personal style and passion for music.